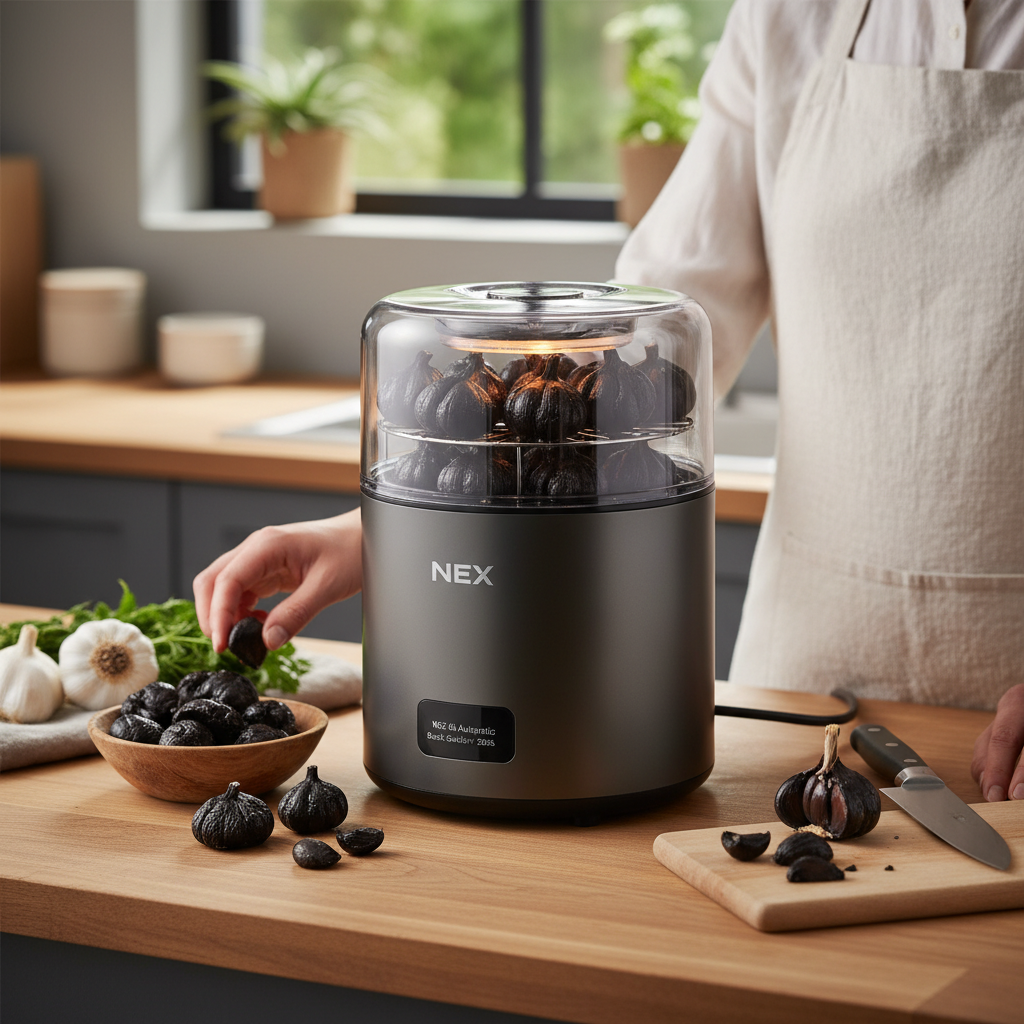
As an Admin at ReviewESL.com with over a decade of deep expertise in black garlic fermenting machines, I’ve seen firsthand how critical proper cleaning is to the success and longevity of your fermentation equipment. Whether you’re a home enthusiast or managing larger operations, neglecting your fermenter’s cleanliness can lead to disastrous results, from off-flavors and failed batches to potential health risks. This comprehensive guide will walk you through the precise steps and best practices for cleaning your fermenter tray and pot, ensuring your black garlic, or any other fermented product, achieves its peak quality every single time. By following these tried-and-true methods, you’ll not only extend the life of your valuable equipment but also guarantee consistent, delicious outcomes.
Why Proper Fermenter Cleaning is Non-Negotiable
Maintaining impeccable hygiene for your fermenter tray and pot is the cornerstone of successful fermentation. Unwanted microorganisms can quickly take root on uncleaned surfaces, leading to contamination that can spoil your entire batch, create undesirable off-flavors, and even pose health hazards. A thoroughly cleaned and sanitized fermenter, on the other hand, provides the ideal environment for beneficial bacteria and yeasts to thrive, ensuring the quality and safety of your fermented foods.
It’s crucial to understand the distinction between cleaning and sanitizing. Cleaning removes visible dirt, organic matter, and residues, while sanitizing reduces unwanted microorganisms to a safe level. Both steps are essential and one cannot effectively happen without the other. Skipping either phase significantly increases the risk of contamination and impacts the final product.
Essential Tools and Cleaning Agents for a Spotless Fermenter
Equipping yourself with the right tools and cleaning agents is the first step toward achieving a truly spotless fermenter. Using the correct supplies protects your equipment and ensures effective cleaning.
For physical scrubbing, you will need:
- Soft-bristled brushes: Ideal for gently dislodging stubborn residue without scratching surfaces.
- Non-abrasive sponges or soft cloths: Perfect for wiping down surfaces and applying cleaning solutions.
- Flexible hose or sprayer: Helpful for rinsing hard-to-reach areas.
When it comes to cleaning agents, focus on food-grade options designed for fermentation equipment:
- Mild detergents or dish soap: Suitable for initial cleaning to break down organic matter. Always ensure they are fragrance-free to prevent lingering odors that could transfer to your fermented product.
- Brewery-specific alkaline cleaners (e.g., PBW, OxiClean Free): These powdered alkaline solutions are highly effective at breaking down organic residues, especially after tough fermentation cycles. Always use the unscented, dye-free versions.
- Acid-based sanitizers (e.g., Star San, SaniClean): These no-rinse sanitizers are excellent for eliminating bacteria and wild yeasts after cleaning. They are typically safe for most fermenter materials.
- Iodophor: Another effective sanitizer that can be used, particularly for plastic equipment.
- Peroxide-based sanitizers: These act by releasing oxygen to kill microbes and often break down into harmless water and oxygen.
What to strictly avoid:
- Abrasive scrubbers or metal brushes: These can scratch the surface of your fermenter, creating microscopic crevices where bacteria can hide and multiply, making future cleaning much harder.
- Bleach on stainless steel: While effective for plastics, sodium hypochlorite bleach can corrode and pit stainless steel over time. If you must use it for plastic, ensure it’s heavily diluted and rinsed meticulously.
- Soaps with oils or fragrances: These can leave residues that not only affect the taste and aroma of your black garlic but also interfere with the fermentation process itself.
Step-by-Step Guide: Cleaning Your Fermenter Tray and Pot
A methodical approach to cleaning your fermenter tray and pot is crucial for thoroughness and preventing future issues. Each step builds upon the last, ensuring no residue is left behind.
Immediate Post-Fermentation Rinse
|
Our Picks for the Best Black garlic fermenter in 2026
As an Amazon Associate I earn from qualifying purchases.
|
||
| Num | Product | Action |
|---|---|---|
| 1 | 5L Black Garlic Fermenter, Automatic Garlic Fermenting machine, Wine Fermenting Machine, Yogurt Maker with Temperature Control |

|
| 2 | TECHTONGDA 5L Black Garlic Fermenter 110V Garlic Cooker 3D Heating Full Automatic Intelligent Control |
|
| 3 | 110V 6L Black Garlic Fermenter Intelligent Fully Automatic Black Garlic Machine Black Garlics Ferment Pot Garlic Ferment Box Black Garlic Maker DIY Cooker |
|
| 4 | 6L Black Garlic Fermenter Multifunctional Intelligent Fermenter Pot 6L Black Garlic, Sweet Rice, Natto,Yogurt Maker Garlic Fermenter Machine DIY Cooker |
|
| 5 | Moongiantgo 8L Black Garlic Fermenter Garlic Fermenting Machine, Easy One-Button Operation Automatic Intelligent Large Capacity Black Garlic Maker with Precise Time Control for 6-16 Days, 110V (8L) |
|
| 6 | WantJoin Black Garlic Fermenter 6L - Full Automatic Intelligent Control Black Garlic Maker, 360° Even Fermented,Makes 3-4 LBS Garlic Fermenter Machine, Makes Multi Clove & Whole Clove Garlic |
|
| 7 | 5L Black Garlic Fermenter Full Automatic Intelligent Control Garlics Maker Multi Clove Garlic Cooker FCC UL Approved |
|
| 8 | Moongiantgo 7.5L Black Garlic Fermenter, Automatic Intelligent Control Garlic Fermenter Natto, Yogurt, Kimchi, Wine Fermenter Machine, Garlic Cooker with Precise Time Temperature Control, 110V (Brown) |
|
| 9 | INTBUYING 6L Black Garlic Fermenter,Garlic Ferment,Black Garlics Ferment Pot,Full Automatic Intelligent Control Black Garlics Maker Black Garlic Maker |
|
| 10 | 6L Black Garlic Fermenter,Yogurt Maker with Adjustable Temperature & Time Control,Kimchi machine,Sweet Rice Wine Maker Full Automatic,Natto Maker,FCC UL Listed |
|
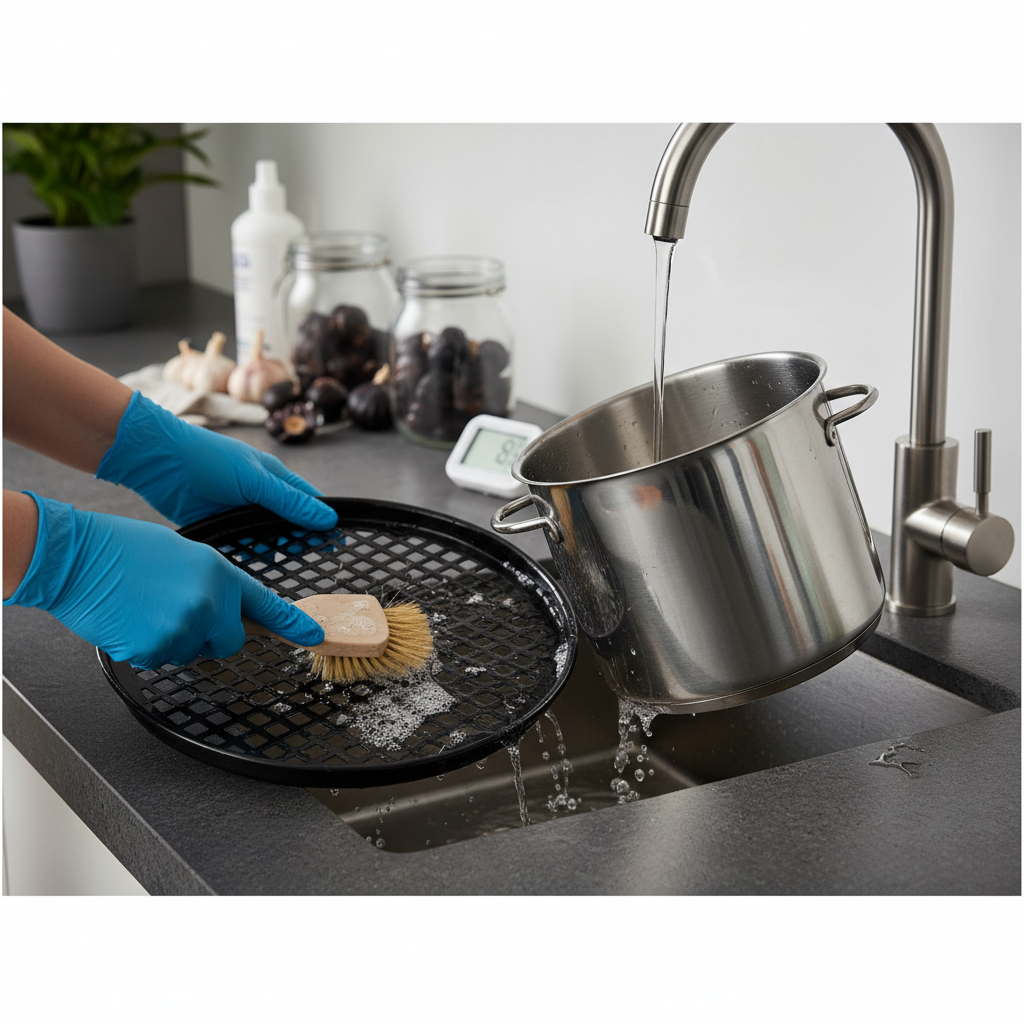
As soon as your black garlic fermentation is complete and the contents are removed, perform an immediate rinse. This is perhaps the most critical initial step. Fill the pot and tray with warm water to loosen any remaining garlic residue, sticky sugars, or sediment. Vigorously swish the water around and manually scrape off any large pieces of debris with a soft spatula or brush. This quick action prevents residue from drying and hardening, which makes deep cleaning significantly more challenging.
Deep Cleaning with Detergents
Once the initial rinse is done, it’s time for a more intensive wash. Disassemble all removable parts of your fermenter, including the inner pot, trays, lids, and any gaskets. Fill the inner pot and a separate basin (if needed for smaller parts) with warm water and add your chosen mild, fragrance-free detergent or a brewery-specific alkaline cleaner. Ensure proper dilution according to the product’s instructions. Submerge all removable components and scrub thoroughly using a soft-bristled brush or a non-abrasive sponge. Pay close attention to corners, seams, and any textured surfaces where residue might cling.
Tackling Stubborn Residue and Stains
For particularly stubborn, caked-on residue or discoloration, soaking can be highly effective. After the initial scrub, mix a stronger solution of your alkaline cleaner in warm water and allow the affected parts to soak for several hours, or even overnight, as recommended by the cleaner’s instructions. For extreme cases, some homebrewers use oxygen-based cleaners like OxiClean (ensure it’s the plain, fragrance-free version) for an overnight soak. This allows the cleaner to penetrate and loosen the hardened grime, making it much easier to scrub away afterward. Always ensure the material is compatible with extended soaking.
The Critical Rinse
Following a thorough scrub and any necessary soaking, rinsing is paramount. Rinse all components meticulously under hot running water until every trace of cleaning solution is gone. This often requires rinsing multiple times. Any lingering detergent can leave behind flavors, interfere with the fermentation, or even cause foaming issues. Visually inspect each piece to confirm it’s sparkling clean and free of suds or film. For components that are difficult to rinse manually, a flexible hose or sprayer can help ensure all interior surfaces are flushed completely.
Mastering Sanitization for a Contaminant-Free Environment
Cleaning removes the visible, but sanitization takes care of the invisible. This step is crucial to prevent the growth of unwanted microorganisms that can spoil your fermented product. You have several effective options, but the key is to ensure proper contact time and application.
The most common and highly recommended sanitizers for fermenters are “no-rinse” solutions like Star San or SaniClean. These acid-based sanitizers work by creating an environment where microbes cannot survive, and any residual foam is harmless to your fermentation. Dilute them according to the manufacturer’s instructions, typically using cool or room-temperature water. Submerge all cleaned parts or fill the fermenter with the solution, ensuring every surface comes into contact with the sanitizer for the recommended time (often as little as one minute).
For plastic components, diluted bleach (sodium hypochlorite) can be used, but with extreme caution. Use regular-strength, unscented bleach diluted to about one tablespoon per gallon of cold water, and soak equipment for five minutes. It is absolutely vital to rinse plastic components at least three times with hot water after using bleach, as residual bleach can kill beneficial cultures or impart off-flavors. Avoid using bleach on stainless steel as it can cause corrosion.
Iodophor is another excellent sanitizer, particularly good for both plastic and stainless steel. It typically leaves a light brown tint which fades as it dries, indicating its effectiveness. Peroxide-based sanitizers are also available, which work by oxidation and break down into water and oxygen, making them safe and environmentally friendly.
Remember, after sanitizing, do not rinse with tap water unless specified by the product. Most no-rinse sanitizers are designed to be left on the surface, and rinsing can reintroduce contaminants. Allow the sanitized equipment to air dry completely, or if using immediately, drain excess solution.
Specific Considerations for Black Garlic Fermenters
Black garlic fermenters often have unique components that require special attention during cleaning. The materials and construction demand specific care to ensure both cleanliness and longevity.
- Removable Parts are Key: The inner pot and any stainless steel shelving or cages within your black garlic fermenter are designed to be removed for thorough cleaning. These should be washed with warm, soapy water after each use, rinsed meticulously, and dried completely. This prevents the buildup of sticky garlic residues that can harbor bacteria.
- Exterior Care: The main unit of your black garlic fermenter, which houses the heating elements and control panel, should never be immersed in water. Instead, wipe the exterior with a soft, damp cloth that has a small amount of mild, soapy water. Follow up with a clean, damp cloth to remove any soap residue, and then dry it thoroughly.
- Aluminum Inner Bowls: Some black garlic fermenters feature aluminum inner bowls. These should never be placed in a dishwasher. The harsh detergents and high heat of a dishwasher can cause aluminum to oxidize, leading to discoloration, pitting, and potential damage to the pot’s surface. Always hand wash aluminum parts.
- Avoid Abrasives: To protect the surfaces of your fermenter’s pot and tray, particularly if they have non-stick coatings or are made of softer metals, avoid using abrasive cleaners, steel wool, or metal brushes. Stick to soft brushes, sponges, and cloths to prevent scratches that can become breeding grounds for microbes.
- Complete Drying is Crucial: Before reassembling your black garlic fermenter or storing it, ensure all components are absolutely dry. Moisture can lead to mold, mildew, or rust, especially in the tight crevices of the machine. Air drying is often best, or use a clean, lint-free cloth.
“A well-maintained black garlic fermenter is an investment that pays dividends in quality and consistency. Ignoring cleaning protocols is like building a house on sand—it will eventually crumble.” – Dr. Elena Petrova, Food Science & Fermentation Expert
Common Cleaning Mistakes and How to Avoid Them
Even experienced fermenters can fall prey to common cleaning pitfalls. Being aware of these errors can save you time, frustration, and ultimately, your batch.
One of the most frequent mistakes is not rinsing thoroughly enough after cleaning with detergent. Residual soap can lead to off-flavors in your black garlic and can also inhibit the growth of beneficial microorganisms during fermentation. Always rinse until you see no more suds and feel no slipperiness on the surface.
Another error is using incompatible cleaners for your equipment’s material. As noted, bleach is detrimental to stainless steel, and abrasive cleaners can scratch any surface, creating microscopic havens for bacteria. Always check the manufacturer’s recommendations for cleaning agents suitable for your specific fermenter type.
Neglecting to completely dry your fermenter components before storage or reassembly is a recipe for mold and mildew. These can introduce contaminants that are incredibly difficult to remove and can ruin subsequent batches. Ensure ample air circulation or use a clean, dry cloth.
Finally, improper handling of electronic components is a common and costly mistake. Never immerse the main unit or any electrical parts of your black garlic fermenter in water. Always unplug the appliance before cleaning, and only wipe external surfaces with a damp cloth. Water damage to electronics is often irreversible and can render your fermenter useless. By diligently avoiding these common missteps, you ensure your fermenter remains in peak condition.
Conclusion
Mastering the art of cleaning your fermenter tray and pot is fundamental to achieving consistent, high-quality black garlic and ensuring the longevity of your equipment. From the crucial immediate rinse to the meticulous application of sanitizers and the careful attention to specific materials like aluminum, each step plays a vital role in creating a contaminant-free environment. Remember, cleaning removes visible grime, while sanitizing eliminates microscopic threats, and both are indispensable for preventing off-flavors and promoting healthy fermentation.
By consistently applying the techniques and precautions outlined in this guide, you embody the expertise of a seasoned fermentation technician. Your commitment to proper cleaning will not only protect your investment but also elevate the quality of every batch you produce. So, what steps will you implement today to ensure your fermenter is truly spotless for your next exceptional batch of black garlic?
Frequently Asked Questions
How often should I clean my black garlic fermenter?
You should clean your fermenter’s removable parts (pot, tray) immediately after each use to prevent residue from hardening and microbial growth. The main unit exterior can be wiped down as needed, usually after each cycle.
Can I put my fermenter tray and pot in the dishwasher?
While some stainless steel pots might be dishwasher safe, it’s generally best to hand wash all fermenter components. Especially avoid putting aluminum inner bowls in the dishwasher, as harsh detergents and high heat will cause oxidation and damage.
What’s the difference between cleaning and sanitizing?
Cleaning removes visible dirt, food particles, and organic matter. Sanitizing, which happens after cleaning, reduces the number of microorganisms to a safe level, preventing spoilage and contamination. Both steps are crucial for effective hygiene.
What kind of soap is best for cleaning fermenters?
Use mild, unscented, and dye-free dish soap or, even better, a specialized brewery cleaning agent like PBW (Powdered Brewery Wash) or an oxygen-based cleaner. Avoid soaps with added moisturizers, oils, or strong fragrances, as these can leave residues.
Why is it important to dry my fermenter completely after cleaning?
Thorough drying is essential to prevent the growth of mold, mildew, and unwanted bacteria, which thrive in moist environments. Lingering moisture can lead to contamination and introduce off-flavors into your next fermentation batch.
Can I use bleach to sanitize my stainless steel fermenter?
No, it is strongly advised not to use bleach on stainless steel. Bleach (sodium hypochlorite) can corrode and pit stainless steel over time, creating irreversible damage and compromising the integrity of your equipment.